Quick Tutorial Thursdays; Perfume bottles

IMG_1304 (FILEminimizer)

I have noticed in my sewing box, that I have rather a lot of beads so therefore, I have decided to make perfume bottles out of them.

You will need

-Beads or pearls

-PVA glue or something else that dries clear

-Blutack (Optional)

Wooden toothpick (Optional)

IMG_1305 (FILEminimizer)

First of all, select the beads or pearls that you are going to use, find some smaller beads to place on the top of them to make “caps”,

Then, put a tiny dap or PVA on the biggest bead and stick on the smaller one, I used a toothpick to help my smaller beads get into the right place,

I stuck the bottles into Blutack so that they would not fall over when drying, leave overnight to dry.

IMG_1308 (FILEminimizer)

Here are now my finished bottles, I am quite happy with how they turned out, they will soon be for sale in Basswood Creeks own village market!


I am very buisy at the moment with non sylvanian related things and therefore almost forgot to post this. Anyway, not a lot is happening in the village but I will need to come up with a story for the weekend since I have not posted a story for quite some time, only reviews and tutorials mainly. I hope you all have a good rest of your week!

Emily

School Friends Set Review

IMG_1485 (FILEminimizer)

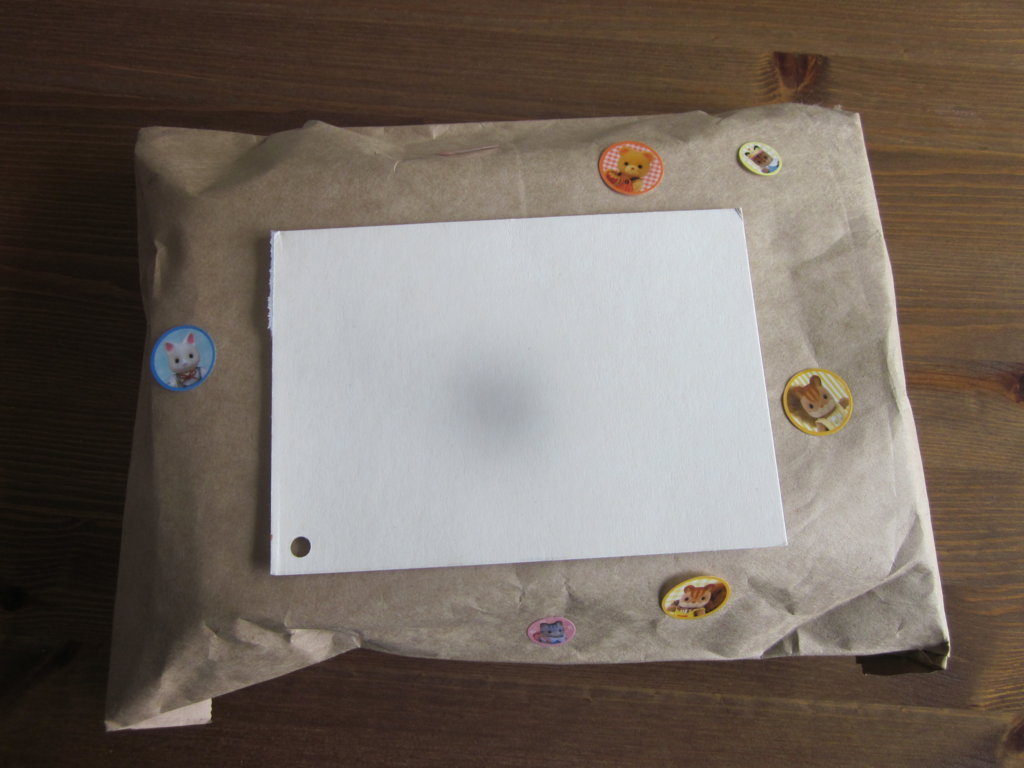
Ah yes, after school on Thursday I had a lovely suprise waiting for me, my parcle from the collectors club had arrived! The parcle was decorated with pretty sylvanian stickers which I have peeled of and put on some sticker paper.

IMG_1486 (FILEminimizer)

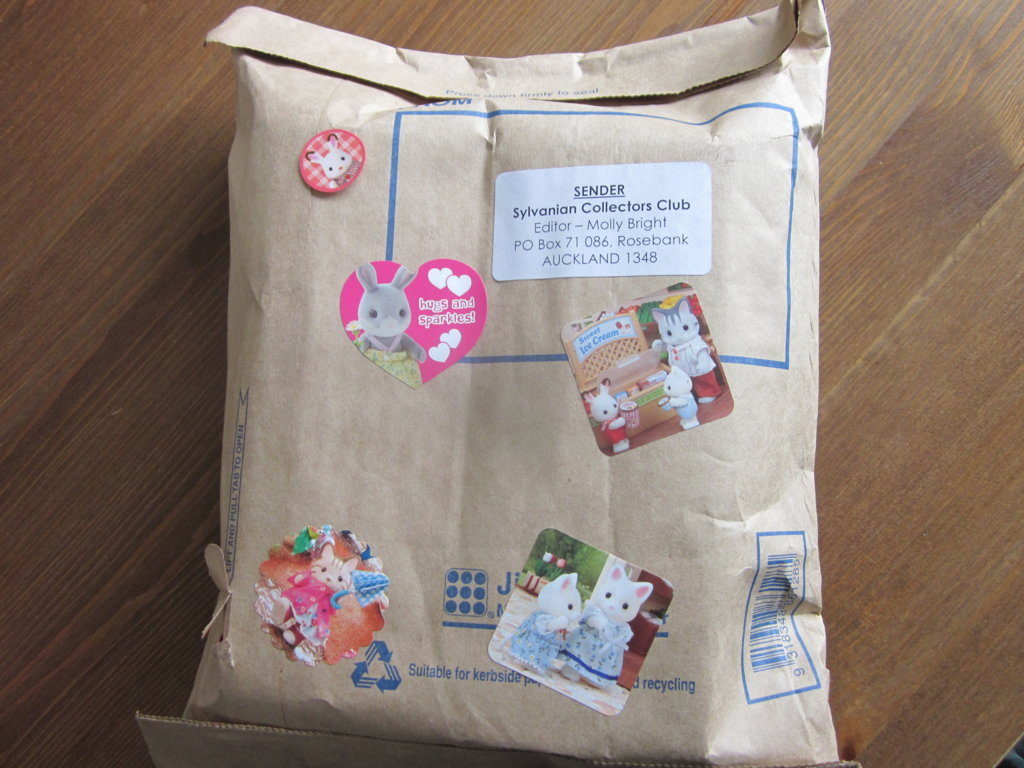
So here is the back of the parcle with four big stickers and one small one of Coco Chocolate.

winning story (FILEminimizer)

So this here was the story that I won with. You had to include 8 or more words from a list that you were given, I used the words garden, keeping warm, winter, cold, friends, love, decoration set. These words are in a bigger font so you can see them.

IMG_1487 (FILEminimizer)

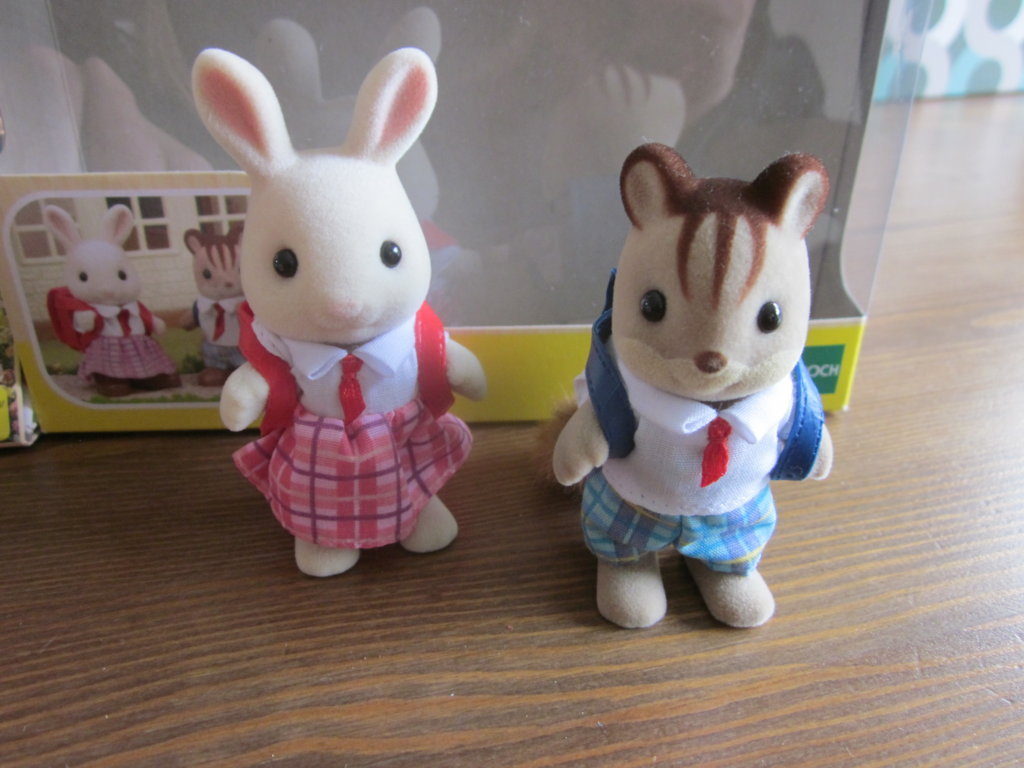
So here are the two school friends and I was very excited to open the box and let the critters out (As usual)

IMG_1488 (FILEminimizer)

In this picture i have just lifted them out of the box and on the left you can see the collection catalouge which I like to collect but sadly I already have three of this type of catalouge so it will have to go into the double ups pile.

IMG_1490 (FILEminimizer)

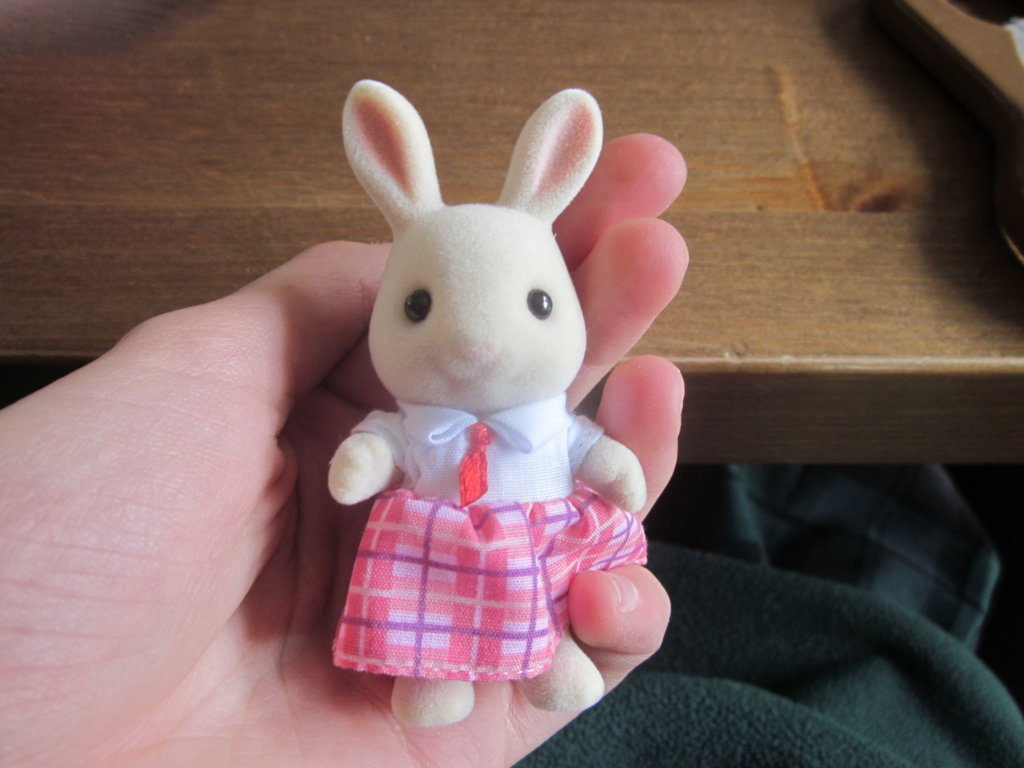
First of all here is the little girl which is actually not that little since all of the figures that I have recived in october last year and onwards have been bigger that the ones before =(.

IMG_1489 (FILEminimizer)

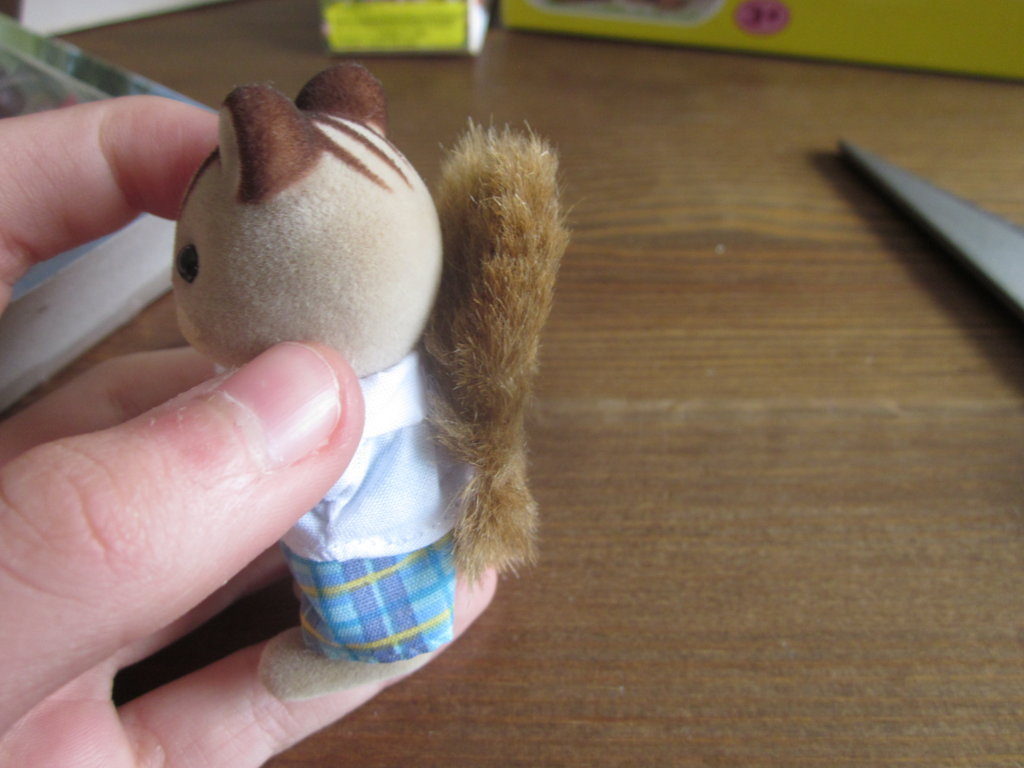
Here is the boy and I was rather suprised when his tail was so flat like a beavers except that it was fluffy. I hope it will thicken up and unfold over time.

IMG_1491 (FILEminimizer)

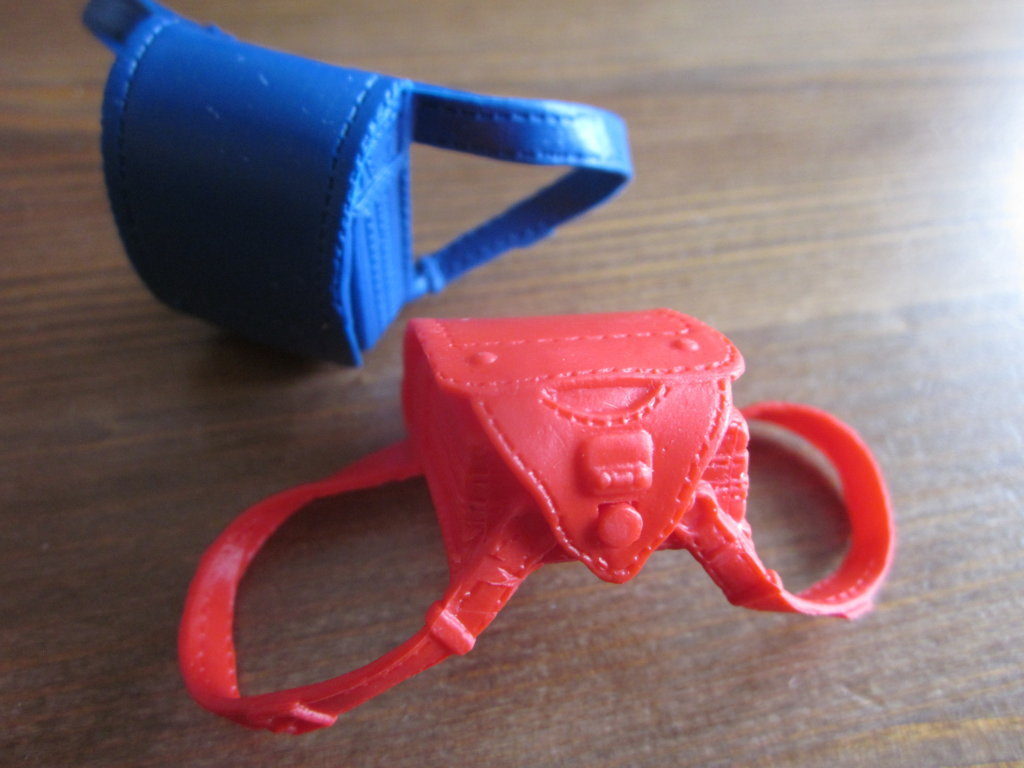
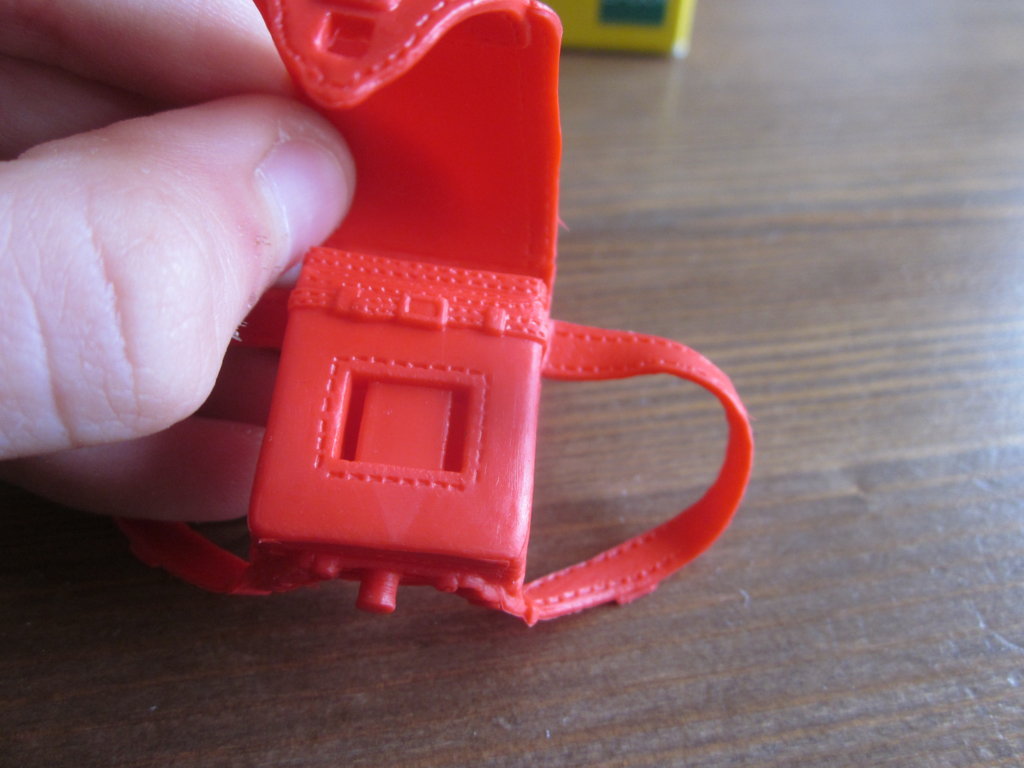
The back packs. I am really dissapointed with them. They are made out of hard plastic which scratches the figures hands when they are put one which is a bit trickey.

IMG_1492 (FILEminimizer)

When you open them they look like this and I am unsure of the purpose of the hole in the middle of the front. Is it so you can thread something through or just to save plastic or something else!?

IMG_1494 (FILEminimizer)

There is also not much space in the backpacks but this is how they look on from the front.

IMG_1495 (FILEminimizer)

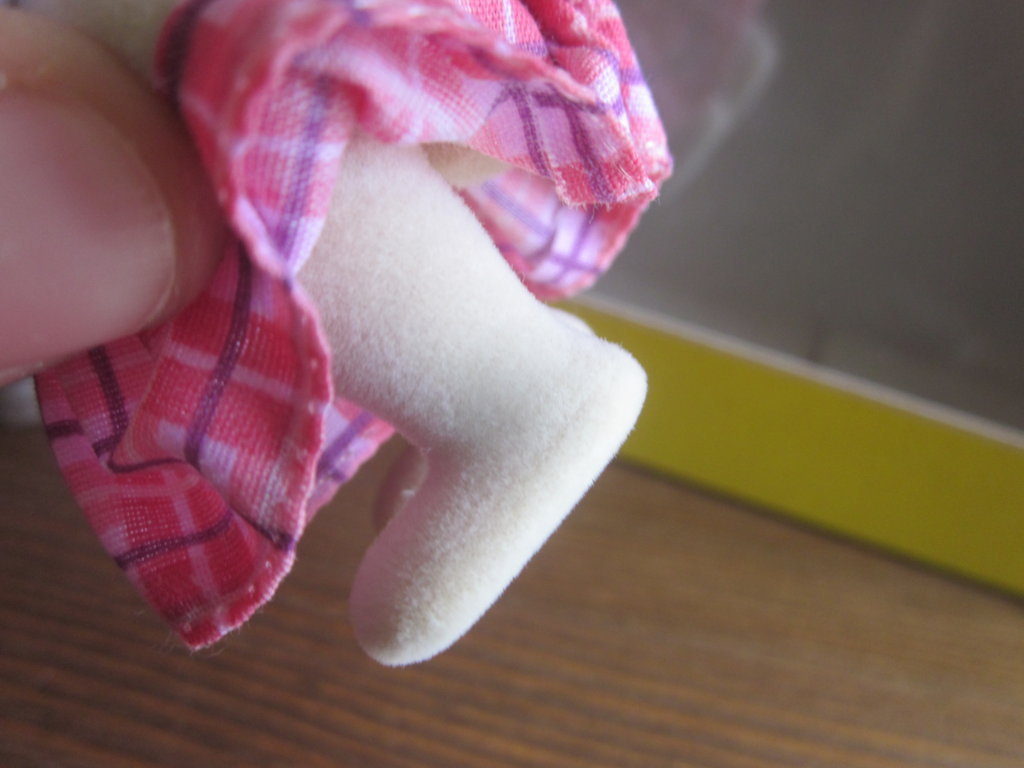
Here is from the back. I have also discovered that it is very hard to stand figures up which do not have tails which go to the ground to support the weight of the empty back pack.

IMG_1496 (FILEminimizer)

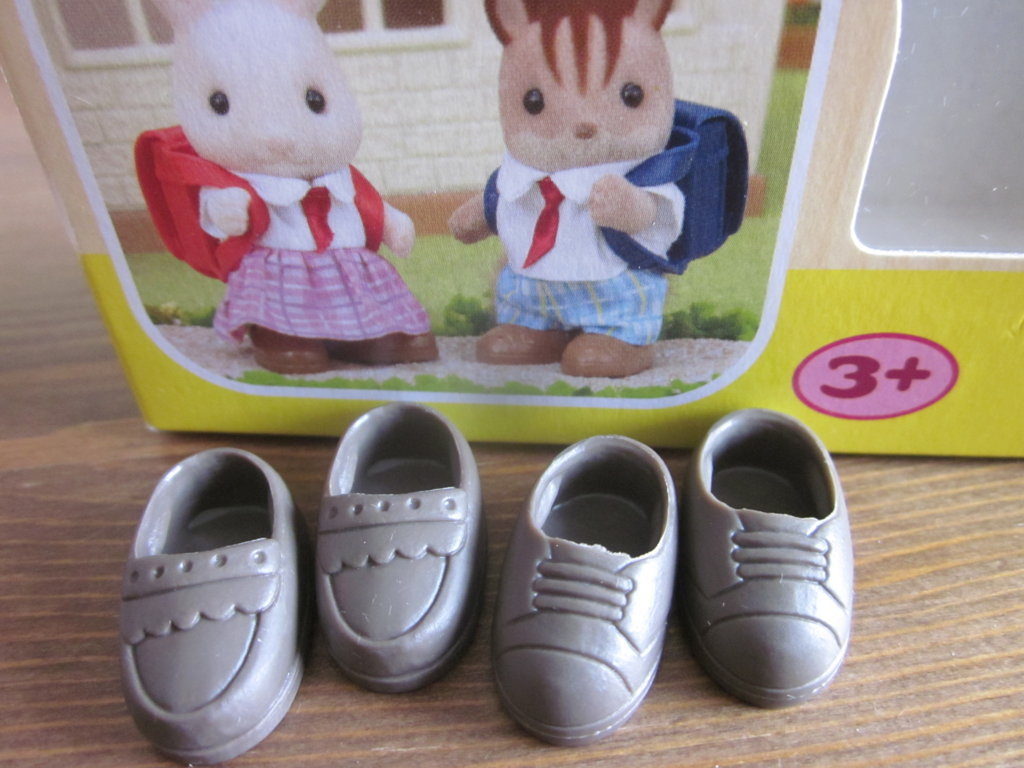
Here are the shoes. I really do wonder why they are not the same colour of the ones in the photo though. They are also made of hard plastic and have rough edges.

IMG_1497 (FILEminimizer)

So I put them on and I have no idea if you can see this but it leaves a dent in the foot after you first put it on because of th rough edges. Also when they made the figures bigger and the feet bigger they forgot to make the shoes bigger so they are hard to put on on a new figure.

IMG_1498 (FILEminimizer)

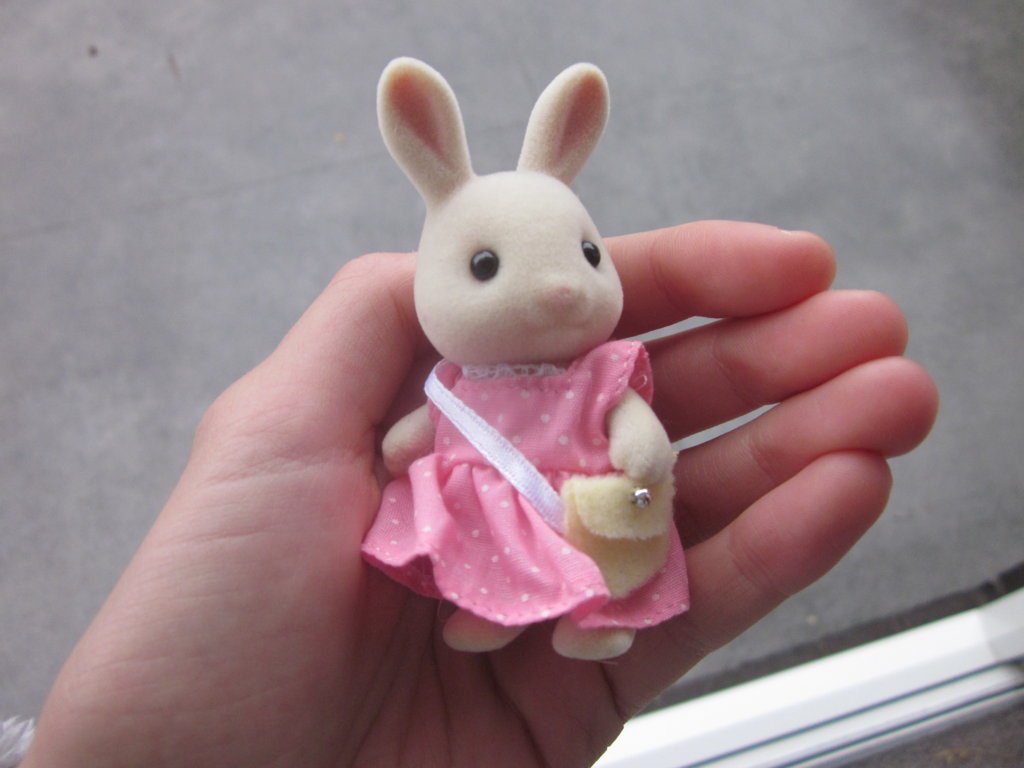
This is what the girl will now look like and her name is Rosie while the boys name is Harrison. Rosie is 13 while Harrison in 14.


Even though I am not truely happy with this set I did win it and I am still happy and gratefull about it. I will probably not use the backpacks though but the shoes are displayed in the shoe shop and no one in the village actually wears shoes on a regular baisis. This review was made for all those who are considering to buy this set. Rosie and Harrison are now very eager to meet their new adopting parents until I am able to get their true families. By the way, are you liking Quick Tutorial Thursdays?

Emily

Quick Tutorial Thursday; Dentist Chair

For this tutorial you will need;

-Cardboard

-Pencil

-PVA glue

-Ruler

-Scissors

-Fabric

-Something heavy

-Cellotape

-Wire

IMG_0999 (FILEminimizer)

First of all you draw up a plan how you want your dentist chair to look like and the measurements.

IMG_1002 (FILEminimizer)

1.Rule up all of your pieces and cut out, make sure to label them.

IMG_1003 (FILEminimizer)

2. Next you want to thread some wire trough the holes of your cardboard.

IMG_1004 (FILEminimizer)

3. You bend the wire like the one above.

IMG_1005 (FILEminimizer)

4. As you can see in the gap goes the side of the cardboard hole, do this on the other side as well

IMG_1006 (FILEminimizer)

5. Now you want to cover your head by glueing it down with a bit of PVA glue and cellotape.

IMG_1007 (FILEminimizer)

6. Now you want to thread in the next piece but leave a bit of a gap, glue to prevent the other piece of newspaper from slipping down.

IMG_1009 (FILEminimizer)

7. You cover it like this, mark where you can feel the wire,

IMG_1010 (FILEminimizer)

Cut that out,

IMG_1012 (FILEminimizer)

Apply a little bit of glue and just fold it up

IMG_1013 (FILEminimizer)

IMG_1014 (FILEminimizer)

IMG_1019 (FILEminimizer)

7. Continue to do this till you have finished your chair, make a little base and lamp and you can now chech your sylvanians teeth.

IMG_1054 (FILEminimizer)


Oh my gosh, it is Thursday already! I hope that you like the dentist chair. The school friends set has not arrived yet though if it does arrive soon I will do a review on the weekend aswell as share my winning story with you. If it does not arrive before then I will create a dentist story (Probably).

Emily

School Friends Set

Hello everyone! Just a quick post today. Ah yes, the School Friends Set. I would not have chosen this set myself but I am still looking forward when it arrives. You see recently there was another competition on the collectors club website and I managed to win one of these sets. I am now excited to when they will arrive though I am still a bit unsure what to name them. Unfortunatly the house that I made for my Buttermilks is only designed to have one middle aged child not two and since my buttermilks were used when I bought them, I am wondering if I should replace Hannah for this new figure. The boy squirrel is going to go into the Acorn family for now. I really want the squrell family now since Tobias and this boy are different types of squirells to the rest of the Acorns. As well as this, I am going to make new clothes for both of them.

Emily