Collectors Club Competition Entry

I have decided that instead of posting the hot cross bun tutorial (which I am sure everyone will already know how to do) I am going to share with you my Collectors Club Competition entries. I entered four times since I could not choose who to do the I Love Sylvania about. So there is the Treefellows, Dorothy and Perkin Fisher, Henry and Millie Doormouse and Chelsea Blackberry. By the way you were allowed to enter as many times as you liked. In the competition, you must say who and what you love in Sylvania. Click on the photos to make them biger.

Here they are!

Love sylvanian OWLS (FILEminimizer)

Love sylvanian DOROTHY (FILEminimizer)

Love sylvanian HENRY (FILEminimizer)

Love sylvanian CHELSEA (FILEminimizer)

————————————————————-


Guess what? This morning I got a very friendly email saying that…

I WON!

My prize is one of ten 2016 sylvanian families calenders which I have wanted ever since I saw them on the UK sylvanian store in London at the begining of this year, yay! It is a great way to start the morning expecialy since I am waiting for a sylvanian book to come in the post which I purchased on trade me last week. It got sent on Tuesday and nz post says that they try to deliver them within three working days but now it have been more than a week so…

Have a great week!

Emily

By the way, do you have any ideas how I could improve my tree in my last post?

Big Tree Tutorial

For this tutorial you will need:

Dried thyme (lots of it, I reccomend a thyme plant)

Cellotape or sticky tape

Chopsticks

A flat, smooth rock

PVA or any clear dry glue which does not dry too quickly

Pipe cleaners or hairties or sting etc.

Tissue or toilet paper

Water

Paint (highly recommended)

Note: this tutorial takes some while to do

IMG_0579 (FILEminimizer)

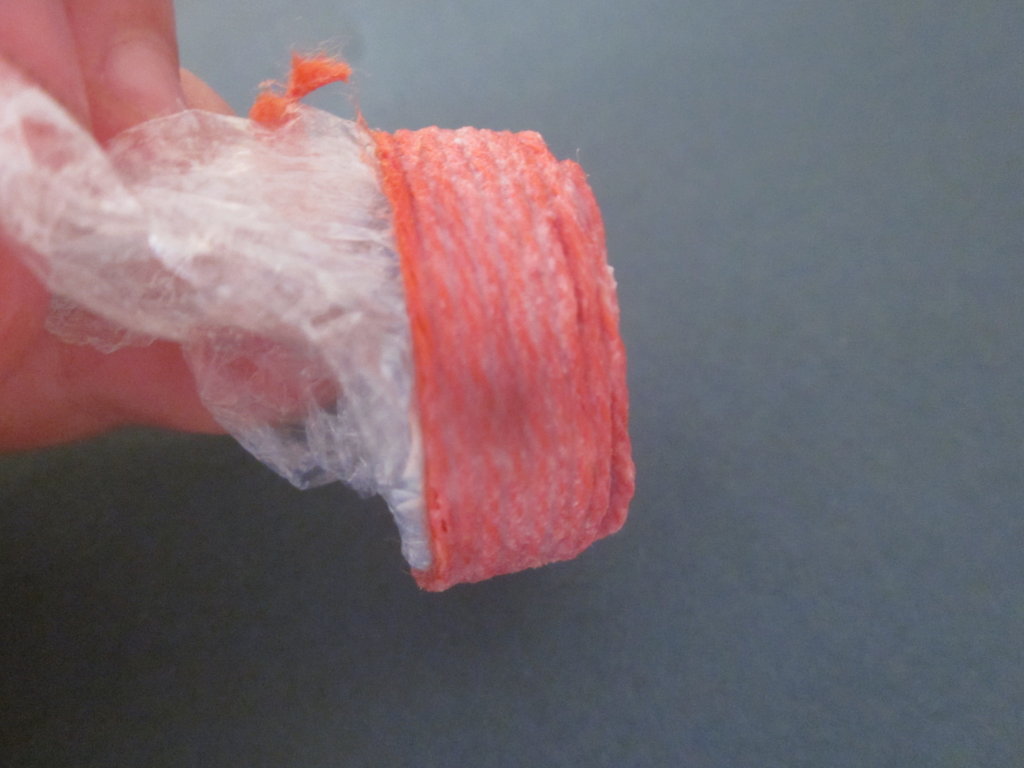
1 Get your dried thyme into bunches, you can use pipe cleaners to hold them together.

IMG_0580 (FILEminimizer)

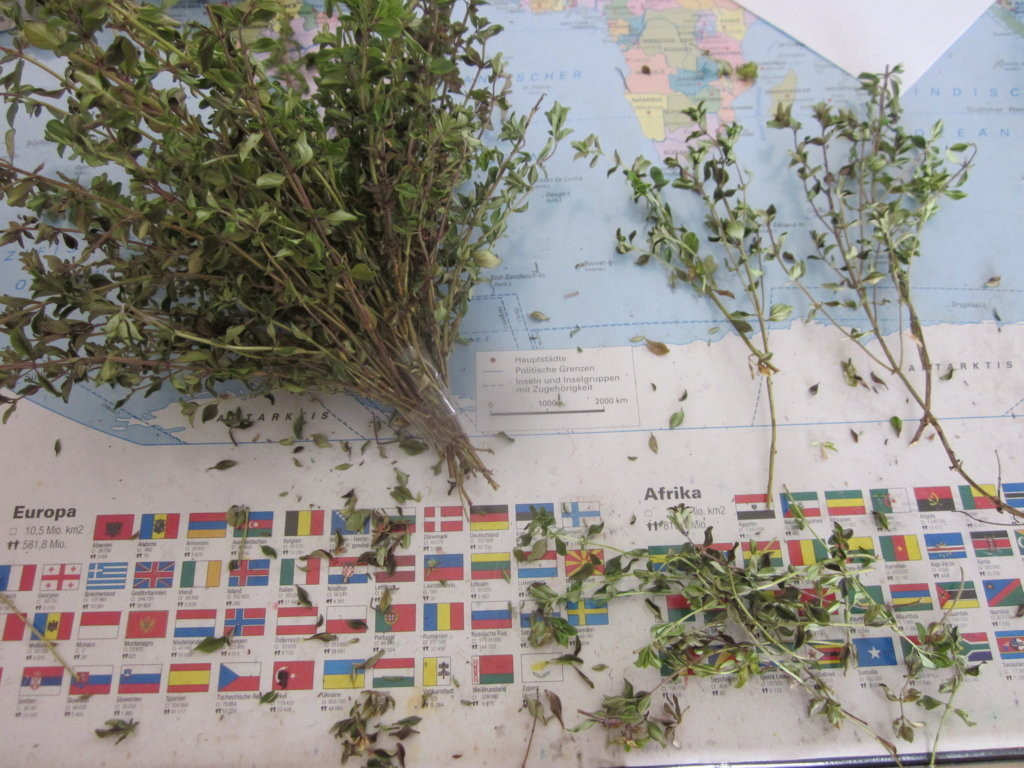
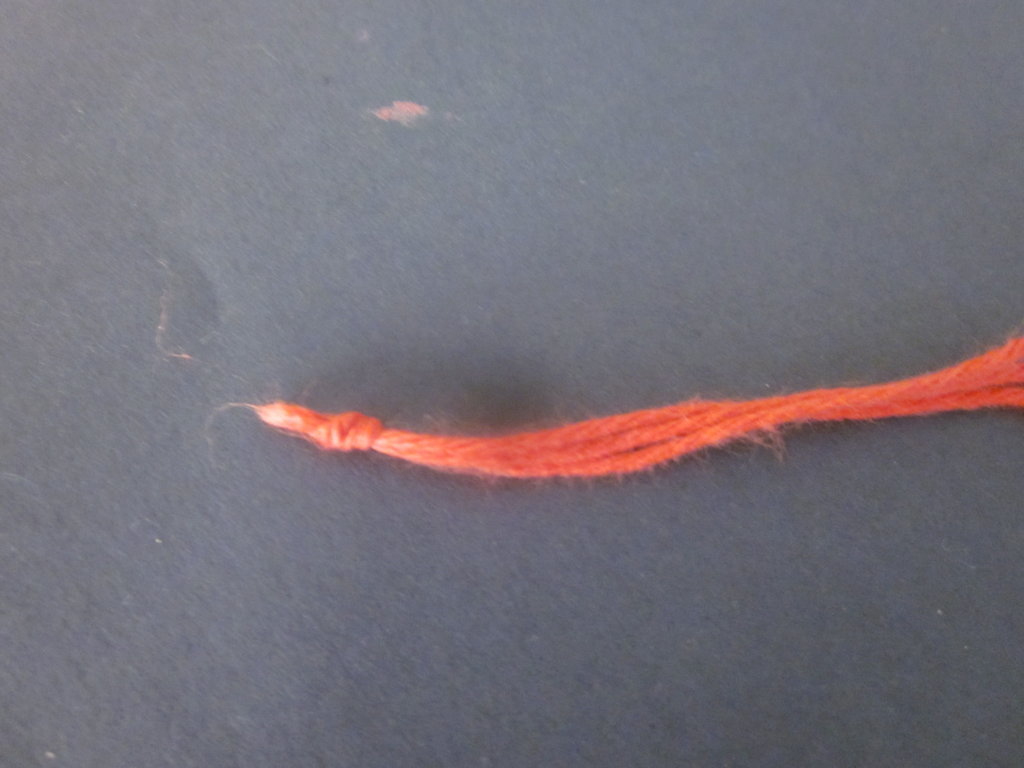
2 Tape them all together one bundle with another then another. You will find some cuttings too small but keep these for my bush tutorial later or earlier next month. Try too keep a look out for tree like cuttings like the ones above on the right. Keep the leaves as well, you will see why later on.

IMG_0581 (FILEminimizer)

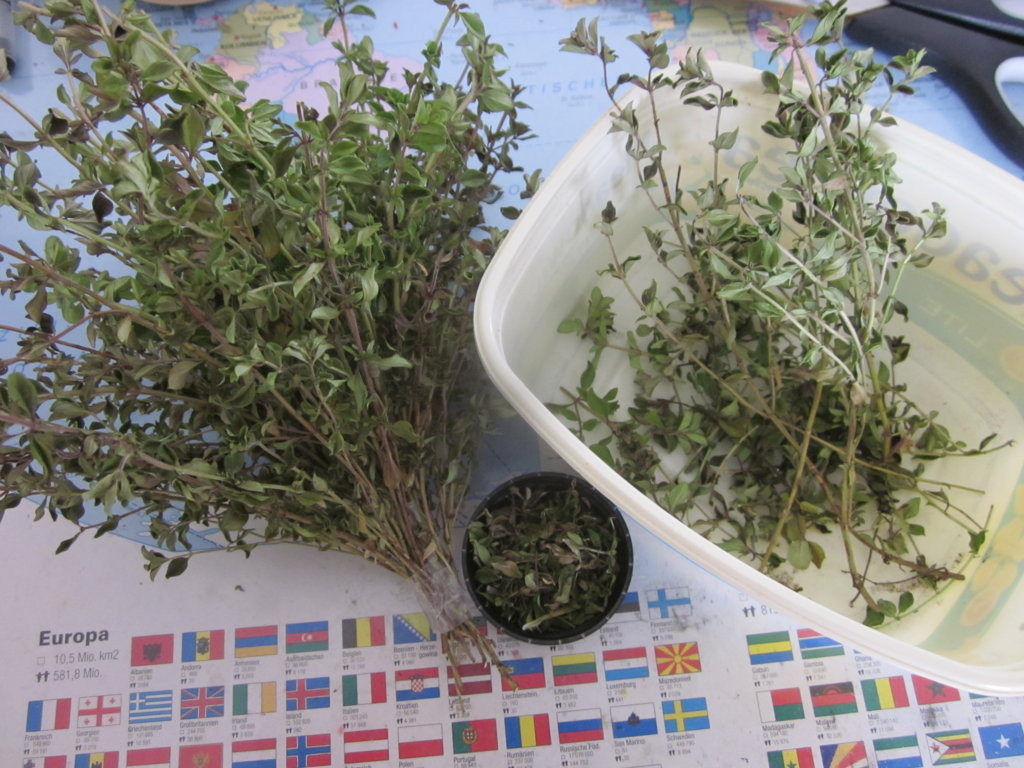
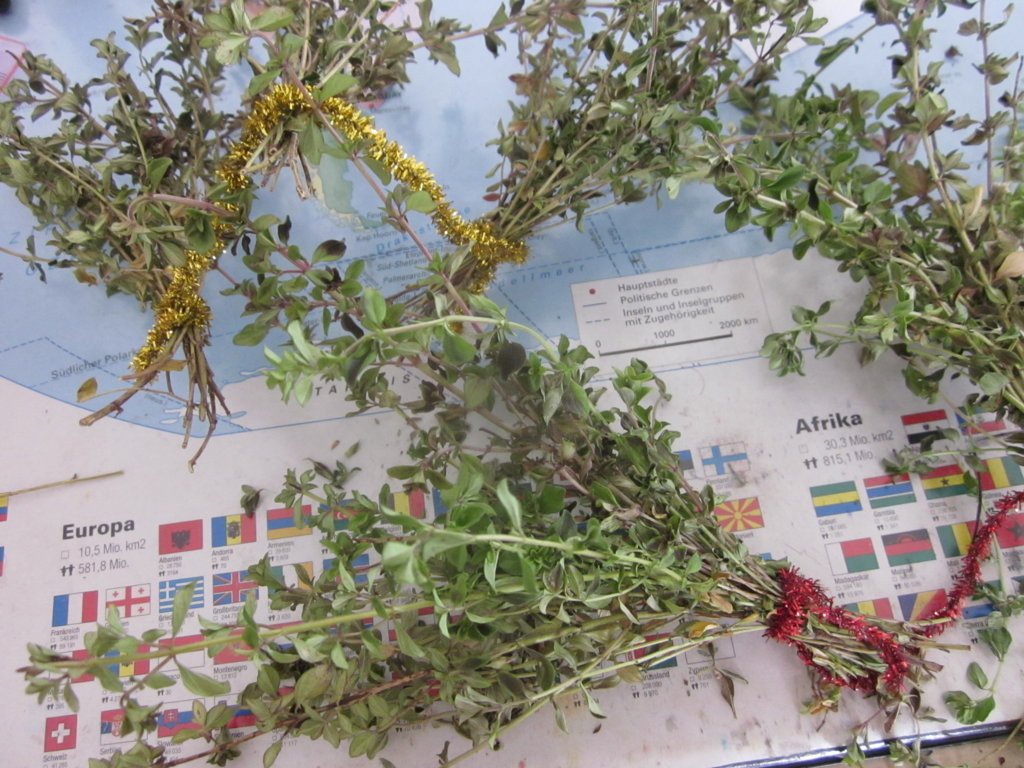
3. This is what you should have now, your tree top, leaves and tree like cuttings+ the cuttings too small.

IMG_0698 (FILEminimizer)

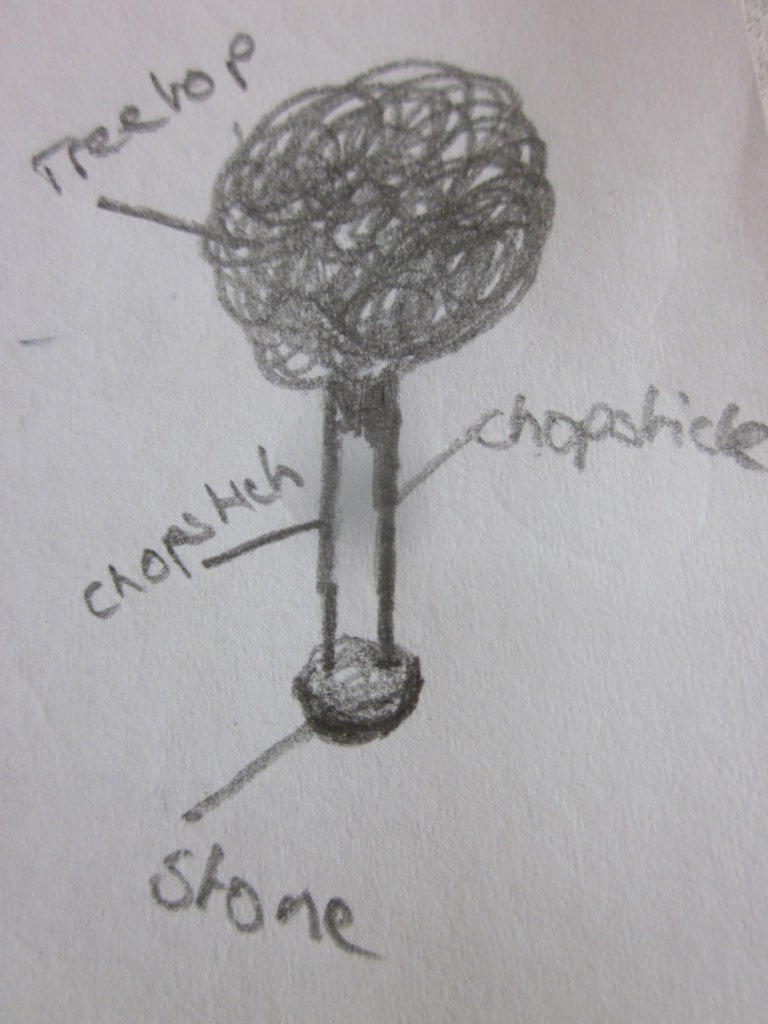
4 I forgot to take a picture of this but these are your next steeps

4a Cut chopsticks the length of the height of your tree.

4b Tape these to your tree top

4c Glue the ends of the chopsticks into your flat stone, it does not matter is the stone is not quite straight. Let it stand up till it s COMPLETELY dry.

IMG_0699 (FILEminimizer)

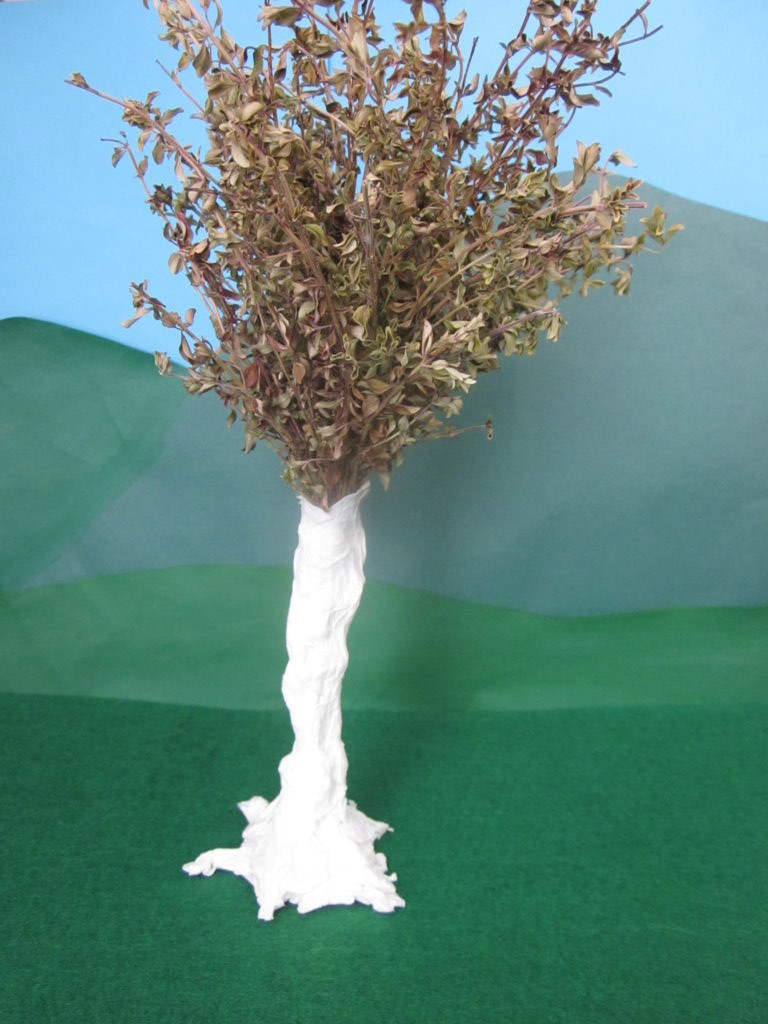
5 Soak your paper towls or paper tissues or toilet paper in water and then cover the two chopsticks, you can use clay for this but I think it is a waste of money. Let this dry.

IMG_0700 (FILEminimizer)

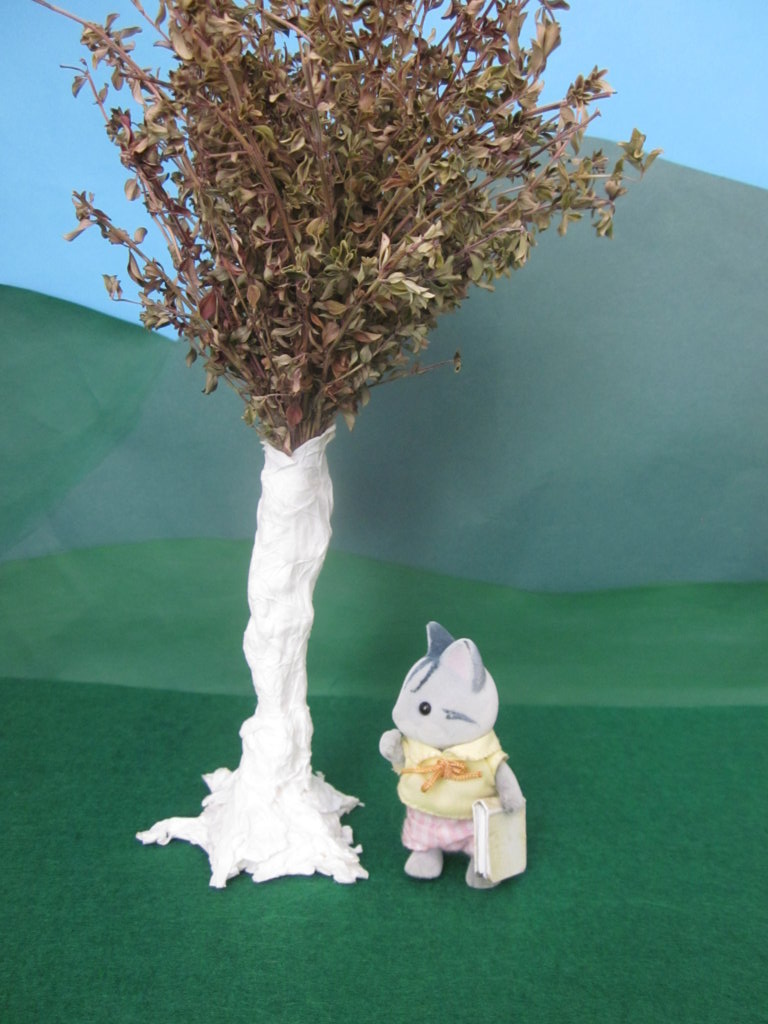
Now, Ashton Fisher has just spotted the tree but said his eyes hurt when he tries to look at it. Well, you can’t have your sylvanians needing to wear sunglasses when looking at the tree you have created!

IMG_0705 (FILEminimizer)

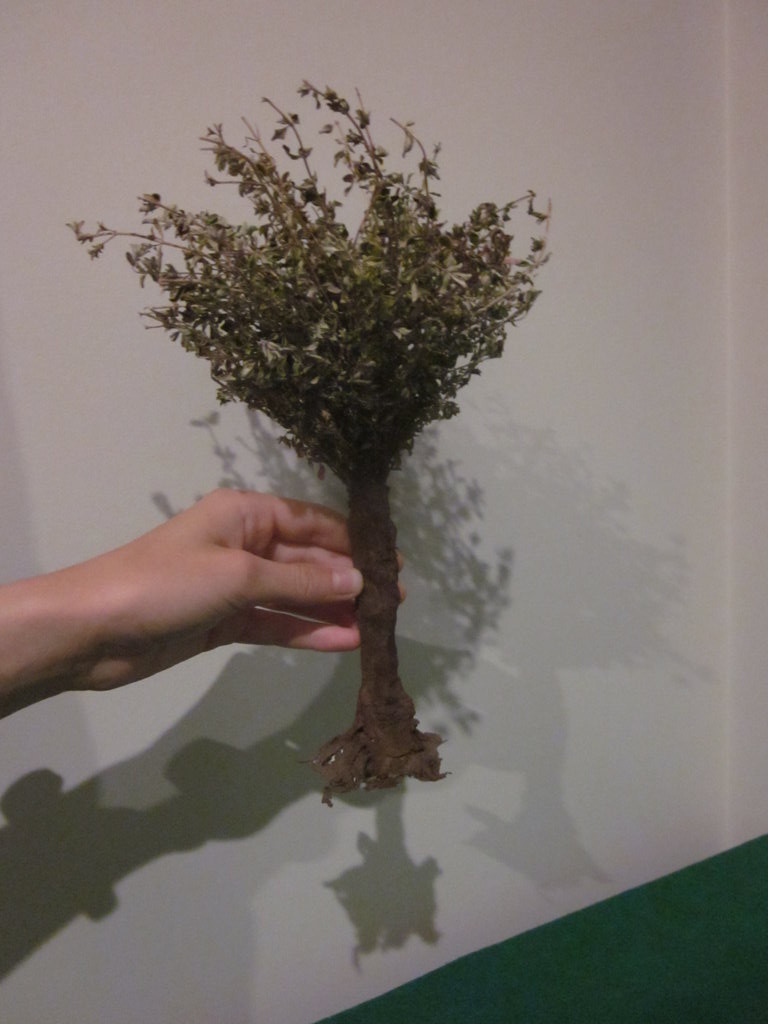
Now just paint your trunk, when using toilet paper, it dries all crinkly so it looks like bark, here is the finished tree, I’ll just pop it down into the village…

IMG_0703 (FILEminimizer)

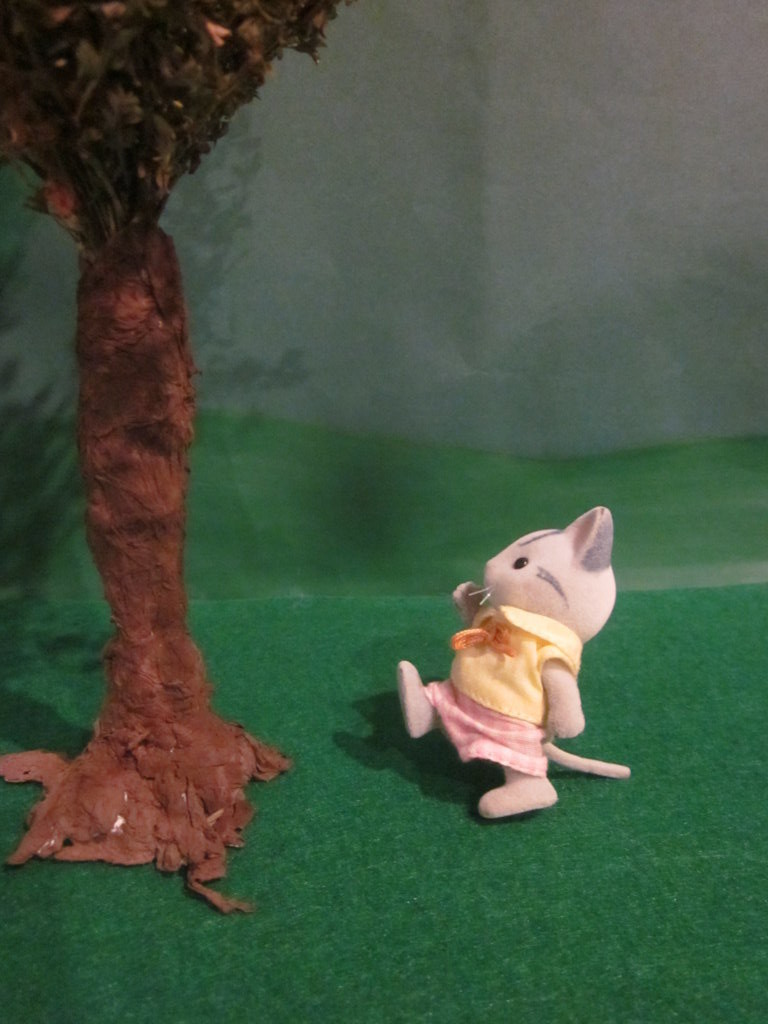
Arggh! It gave Ashton Fisher quite a fright!

—————————————————–

Now this is my post for the weekend, I think that the tree looks very good indeed. With the left over leaves you can put them around on the groud around the tree. I really think that it is a good idea to buy a thyme plant since it very useful when using to make foilage. You could also get several cuttings from a friend to multiply by yourself and if you have a big plant, cut some off too just incase your plant dies which is what I am doing at the moment.

I have decided for the ballet costumes to make four white and one pink one for Rose, do you think I should make a tutorial of the tutus? Now, I will post the bush tutorial next month, easter story at easter and sometime this week I need to fit in my hot cross buns…

Well, have a great week!

Emily

White or Pink?

IMG_0696 (FILEminimizer)

Hello Readers!

For one of my stories that I am going to write, I need to have ballet tutus so I now need to know if I should make them pink or white, keeping in mind that there is one main part (going to Rose Caramel, bunny in picture). Now there are five girls so seven leotards and tutus to make, these are; Kyra Marmalade, Rose Caramel (Main part), Nellie Trunk, Lisa Acorn and Zara Fisher. All of these are middle sized children. So what do you think? Should I do them all white and one pink or all pink and one white or something completely different???

Emily


(This is NOT my post for this week, I will do it soon though 🙂 )

Basket Tutorial

Hello there! I recently had a good look at my bakery and saw some things that did not quite satisfy me, like the uneven, mishaped, looking terrible clay basket I made when I first got my bakery. I decided that I needed to make a new basket. I have already made a basket a year ago but forgot to take photos.

——————————————————

You will need:

– String ( the colour of baket or random)

– Any form of clear drying glue which does not dry too quickly (PVA is good)

-A bottle cap or similar ( a bit smaller than you want your basket to be)

-Glad wrap

-Acrylic paint (If the colour of your basket is not what you would like it to be)

IMG_0659 (FILEminimizer)

  1. Cover your bottle cap thingey with glad wrap.

IMG_0660 (FILEminimizer)

2. Mix your glue with a little bit of water if it is goey

IMG_0661 (FILEminimizer)

3. Using your fingers, put some glue on your string and wrap it around your bottle cap.

NOTE: this is very sticky and if you want you can wear gloves but really, the glue will come off.

IMG_0662 (FILEminimizer)

4. While that is drying a little bit, DO NOT let it dry completely. Take three pieces of string and knot them at one end.

IMG_0664 (FILEminimizer)

5. Plait these strings and cover with glue, set aside to dry, this will be the handle for later.

IMG_0663 (FILEminimizer)

6. Now put more glue on another piece of string and make the bottom of your basket, you needed the sides to be wet so that they glue together. I am doing all of this on the bottle cap.

IMG_0672 (FILEminimizer)

7. Wait till overnight and then slowly pull out your bottle cap.

IMG_0673 (FILEminimizer)

8. Now you can trim the top to make it look good, if you are not happy with your colour you can paint the thing and the handle.

IMG_0676 (FILEminimizer)

9. Glue your handle on your basket and also put more glue on the bottom for this will make it stronger.

——————————————————————————————————–

I popped into the bakery this morning to see the basket and it looks really good. You may find the sides of your basket a bit soft for a while but in about two months it will be hard but not break hard. If you have any questions about my tutorial, please make a comment of it aswell as if you have your own blog that I should check out=)

IMG_0695 (FILEminimizer)

Emily

P.S Am I doing ok with my promise about posting every week end?